Install sensors just about anywhere.
While many existing practices for structural health monitoring (SHM) solutions rely heavily on tethered (wired) systems, our sensors are wire-free and non-destructive. This provides installation flexibility for our system: new construction, repairs to damaged structures, or retrofit into existing concrete. In any case, our sensors and online monitoring system collects and analyzes precise information that leads to proactive long-term maintenance systems.
New construction
Before concrete
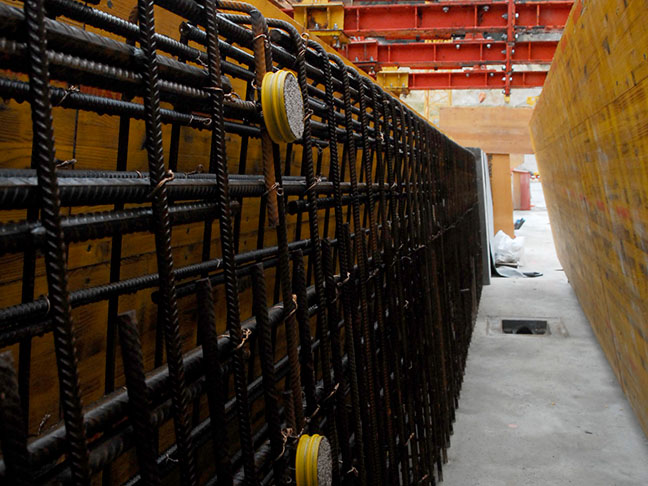
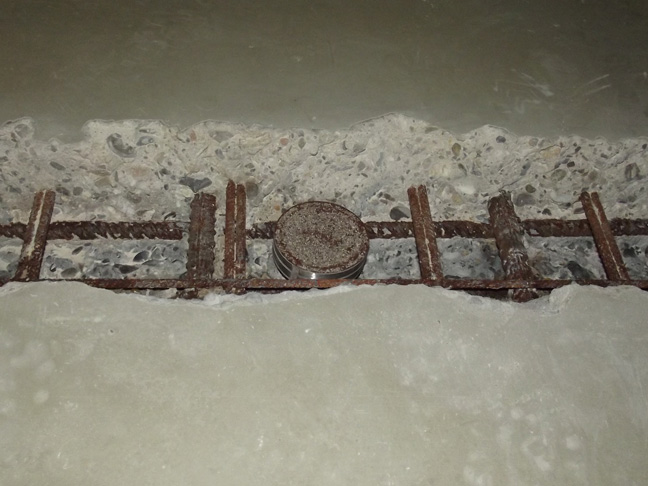
We install the corrosion sensor above the reinforcement (assuming corrosion attack from above) before placing the concrete. Placement of the sensor depends on the engineers’ choice of when to trigger the early warning. Some place the corrosion sensors so that the lowest level of the corrosion wire is precisely at the level of the reinforcement (to know when corrosion starts at that level). However, this does not align with our philosophy of an early warning system. Therefore, we typically advise placing the sensors directly above the reinforcement.
A minimum concrete cover of 5/8 inch (15 mm) from the upper edge of the sensor must be observed for C20/25. For higher concrete strength classes (C40/45+), the value can be reduced by 3/16 in (5 mm).
Repair
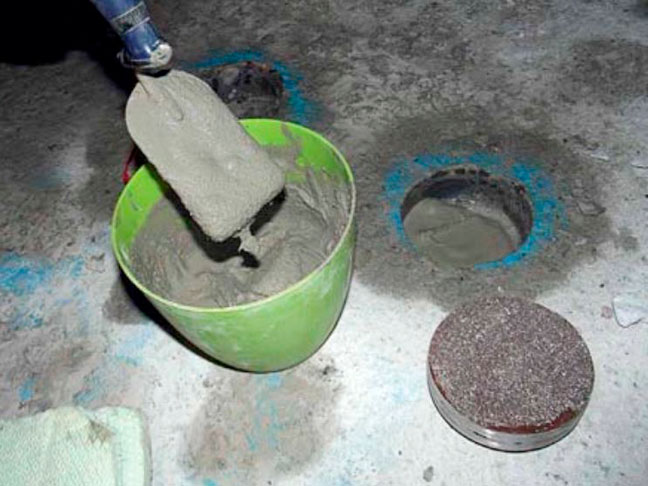
Before concrete patch

Some prefer to install the sensor as close to the surface as possible to detect trends early. In some cases, we fasten the corrosion sensor behind or under the reinforcement because the remaining chloride-contaminated concrete could corrode from below. Regardless, we embed the sensors in a coupling mortar and then seal the repair site according to recognized rules and standards, such as using plastic-modified mortar.
Existing structures
Placement in core hole
Concrete sensor installation on an existing structure requires a core hole, coupling mortar, and finishing (depending on the position) with a mechanical sealant or shrinkage-free plastic-modified mortar. We must observe the subsequent mechanical load situation and corresponding after-treatment of the surface in accordance with current regulations. If there’s need of a final coating, you can apply the coupling mortar to the surface.
Installation Questions?
A collection of frequently asked questions regarding how our sensors are installed.

The retrofit installation of sensors is done through core drilling. The core drilling is only slightly larger than the sensor’s diameter. Initially, the core hole is cleaned and covered with bonding mortar. Next, the sensor is enveloped with bonding mortar. Finally, the sensor is pressed into the core hole. Optionally, a topping mortar, coating, etc., can be applied on the top surface.
Through the readings, it can be observed that the moisture content decreases and an equilibrium moisture level is reached. From this point, the bonding process with the old concrete begins. Moisture and chlorides are transported from the old concrete towards the sensor. This is achieved through the specific properties of the bonding mortar. The bonding mortar referenced to the sensor possesses mineral and open-pore characteristics, ensuring it doesn’t weaken the structure while facilitating bonding between the mortar and the old concrete.
The installation process is briefly demonstrated here.

The sensors can be used in ground areas, ceilings, and wall structures – anywhere steel-reinforced concrete is used.
Installation can be provided either by the manufacturer/seller of the sensors or done independently after training provided.
Ensuring a robust documentation of sensor installation and positioning on building plans is one effective method. Additionally, small marking chips provided with the sensors can be attached to the concrete surface or ceiling upon delivery–clearly indicating the sensor’s installation location. Furthermore, the reader device features a white LED that illuminates when it detects a sensor within a 50cm radius, aiding in locating the sensor.
